
- Inspiration Images: Georgia O’Keeffe’s Drawings
- Reference Photos
- A Note about Ellipse in Perspective
- Contour Drawing vs. Gesture Drawing & Mass-Gesture Drawing
- From Line Gesture to Mass-Gesture Drawing
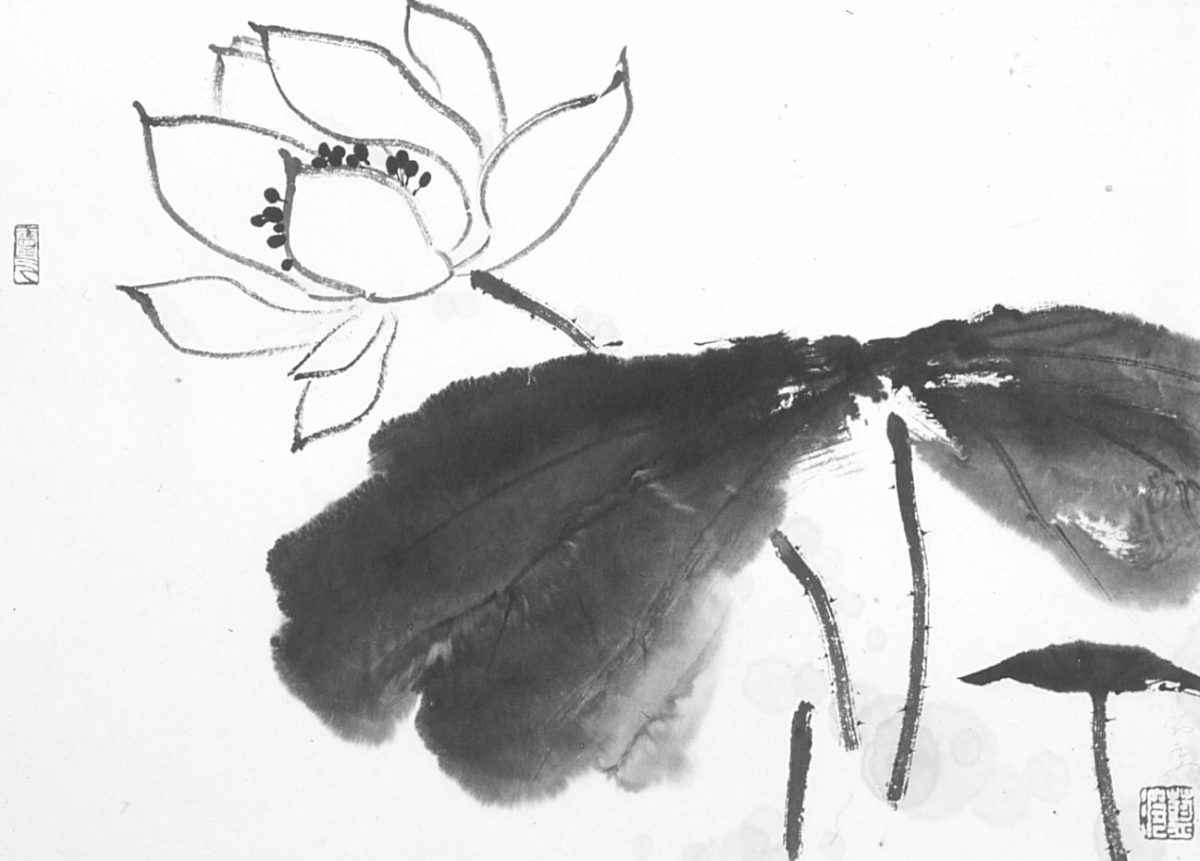
- Lines & Brush-Strokes Inspired by Classical Chinese Art
“I had to create an equivalent for what I felt about what I was looking at—not copy it.” ~ Georgia O’Keeffe
Inspiration Images: Georgia O’Keeffe’s Drawings
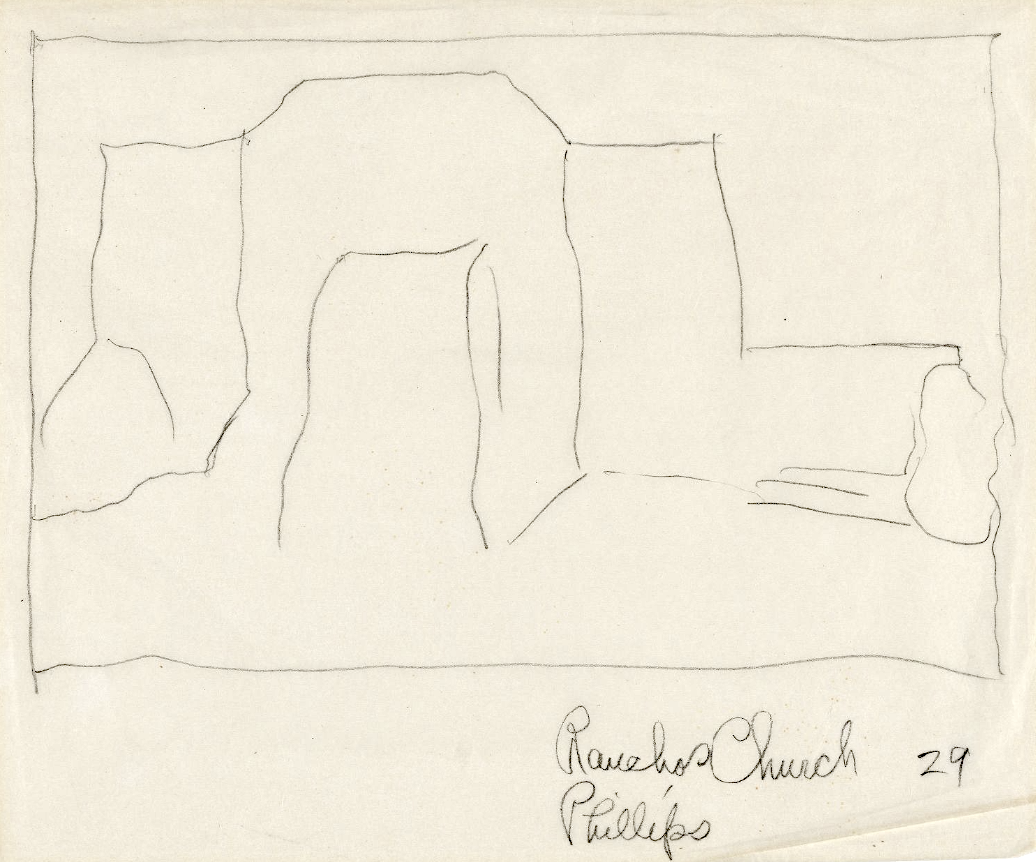
Georgia O’Keeffe, Ranchos Church, 1929, Graphite on paper, 8 1/2 x 10 inches
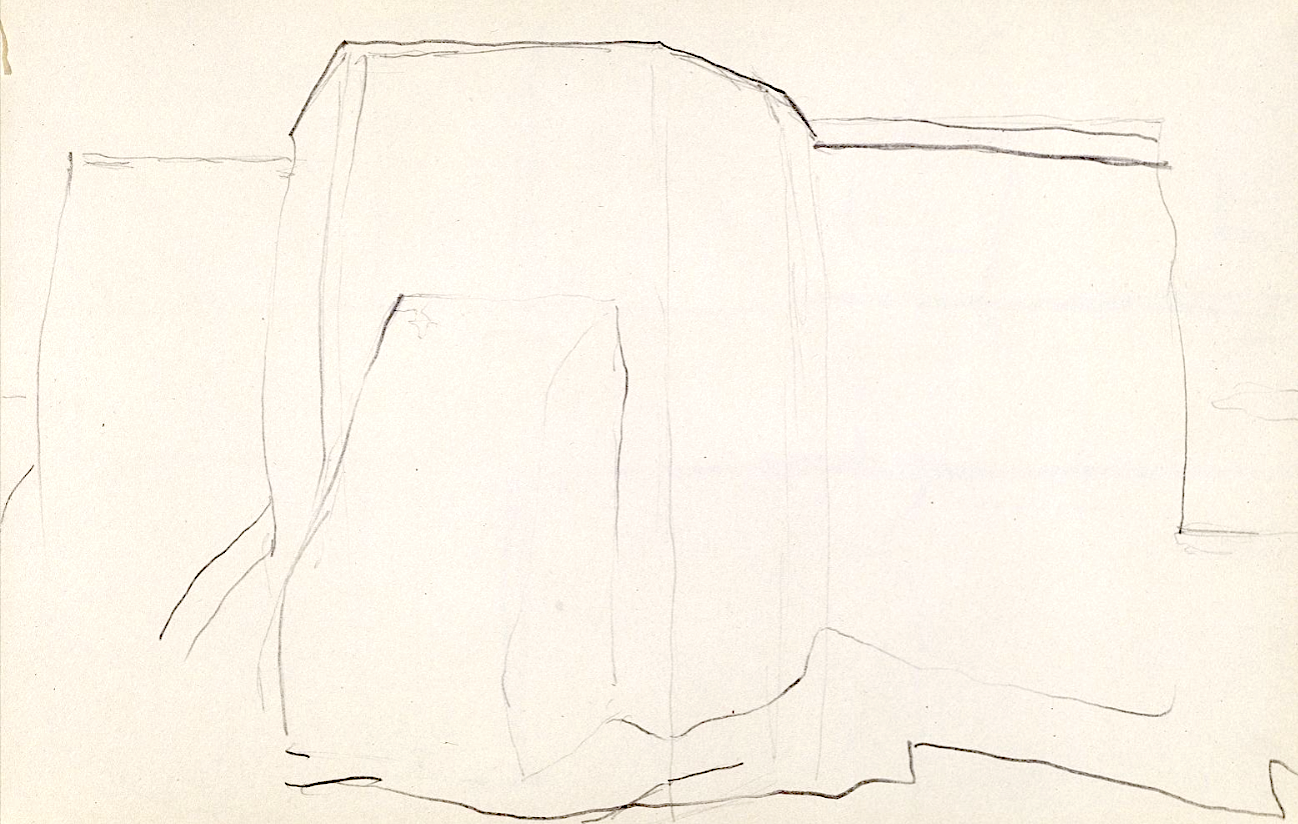
Georgia O’Keeffe, Untitled (Ranchos Church) Schneider Sketchbook, 1929-1930, Graphite on paper, 5 x 7 7/8 in
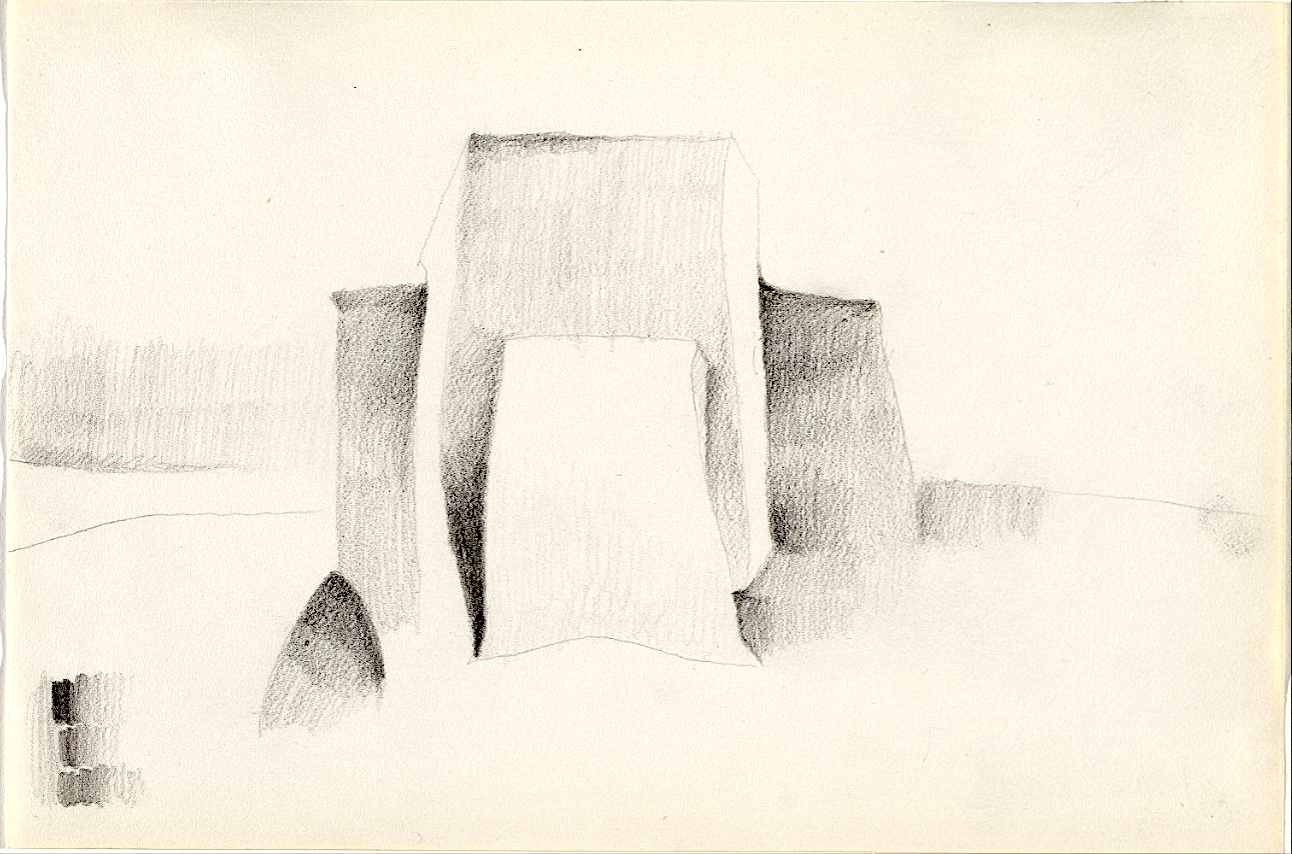
Georgia O’Keeffe Untitled (Ranchos Church), 1929 Graphite on paper, 6 5/8 x 9 15/16 inches


Above:
Georgia O’Keeffe, Branches with Sun, 1976, Charcoal on paper, 27 3/4 x 17 3/8 inches
Georgia O’Keeffe Untitled (Cross) Schneider Sketchbook, 1929 Graphite on paper, 7 7/8 x 5 in

Reference Photos


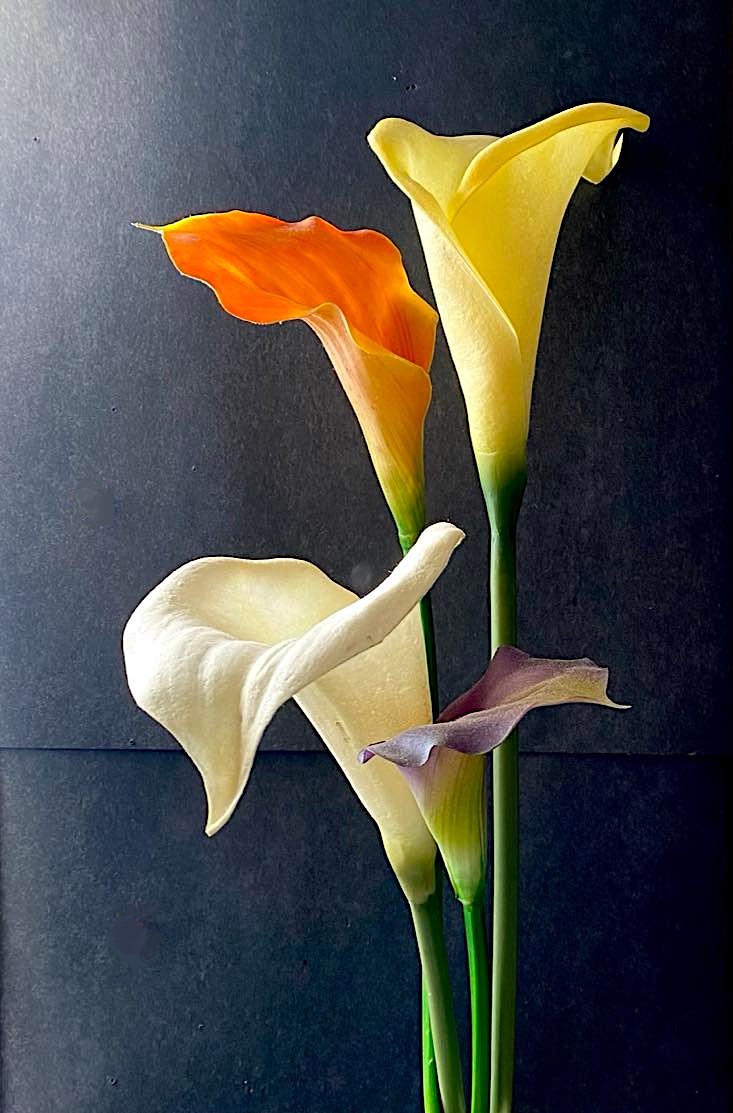
Line Quality
How to Show Separation Between Objects & Background Through Line Quality:

Notice the separation created by the value contrast that makes us aware of the edges of the forms we see and then imagine them as outline when we draw what we see, that is, when we translate our visual experience onto our 2D drawing or painting surface.
Notice in the image in the middle that by thinking just in terms of value-contrast, we can appreciate more the phenomenon of ‘lost and found edges’ caused by the way the light shines on the forms. Try capturing that dramatic change in the contour-definition by varying your line weight/pressure and by the rotating movement of the pencil.
Notice in the image on the extreme right column above that the areas of highlight, with light shining on them or the areas of lost edges (due to not enough contrast) are usually rendered with thinner and more delicate lines, whereas darker and thicker lines are used for designating the more contrasting areas with stronger edges or the areas with less light.
Line quality: beyond the conventional uniformed look of contour drawing
How to use Thick & Thin Lines: varying line-weight to show modulation
Line Weight

You can communicate a lot of information just by changing up the weight of your lines. You can also convey a sense of dimensionality, light, and shadow, by varying your line weight. A thin, delicate, even disappearing line might indicate a shallow edge, like a small wrinkle in a figure’s clothing. It can also indicate that the area it is contouring is an area of highlight. Thicker, heavier lines have more weight to them, and can suggest a more pronounced area of depth, or an area of shadow.
The drawing on the left has uniform line weight throughout the entire drawing. The one to the right, however, has varied line weight. Both are essentially contour drawings. But notice the difference in the information and feelings expressed in the drawings utilizing varied line weight/pressure. That sense of light, dark and dimensionality is missing in the one with lines of uniformed thickness.
For understanding this subtle but powerful quality of line you may search and look for the expressive lines usually found in various classical traditions of Far Eastern Asian, South-East Asian, and South Asian art. We will explore line qualities further in the module on Cross-Contour lines.
Mark-Making Tools
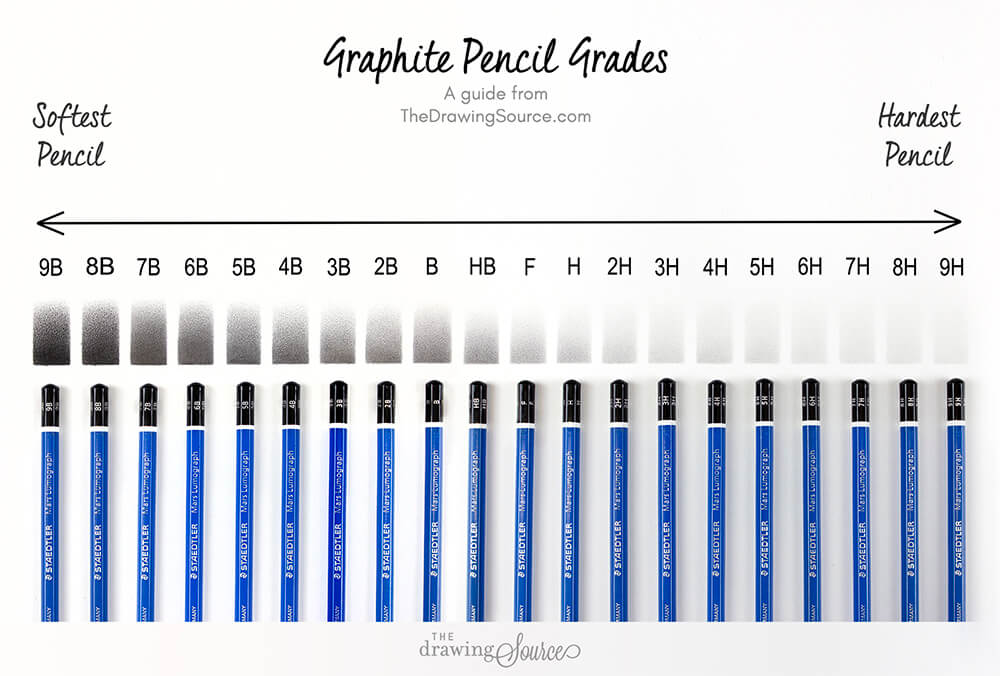

Pencil:
- Useful overview on determining the grades of pencils by their numbersLinks to an external site.
- More on pencilsLinks to an external site.
- How to prepare your pencilsLinks to an external site. for the best results
- How to hold your pencilLinks to an external site.
- More on how to hold your graphite pencils and charcoal pencils correctly and their uses.
Charcoal:
- Various types of charcoalLinks to an external site. and how to use them
- Marks they make and how the look differs.Links to an external site.
Pen & Ink:
Pen and ink and ink drawings with brushes are are considered wet media, here’s a great resource for pigment-pen drawings.
Warm-ups & Setting Up Your Drawing Practice
- Warm-ups: Exercises to Build Muscle Memory: This should be an ongoing practice on 18″x24″ newsprint pad
- Relaxing Doodles: Sometimes, it’s also useful (and relaxing) to start warm-up exercises with spontaneous scribbles on a smaller scale especially when you are not at your studio — and just discover a natural intuitive flow of lines and markings that may or may not result in pattern-making. It can help you feel free, uninhibited, and overcome the initial hesitation looking at the empty space of your larger drawing paper.
Please note: Use of the kind of pencil featured in this particular video above is not recommended. Please use 2B, 4B or 6B as they glide more smoothly on the drawing paper. For this optional exercise, you may also use colored pencils. Some artists experiment keeping their eyes closed during this process and prefer to ‘feel’ the music and let it guide the lines in a more intuitive way. See what works for you. The goal is to learn to relax with the process of connecting with your tools and not worry about perfection.
- How to set up your work area:
Best Angle/Plane, & Height To Position Your Board/Paper:
Just because we see images of artists with easels or drawing horses on text books or social media, those are not necessarily the only options for comfortable set up for making art, for everyone, in every situation. What makes you comfortable is what you should settle for. What matters the most is that you are able to stand up and step back to look at your art from a distance from time to time, and that you are not sitting in one position the entire time, which is not good for the body or the brain to focus in a relaxed and enjoyable manner.
I feel the most comfortable on a slightly tilted surface on top of a table or a desk, sometimes even a cleared out kitchen counter-top and a bar stool. I love the comfort of warmth and aroma of spices in my kitchen as I cook and so, for me, being able to take breaks to look at an ongoing project is very much a happy setting for me.
One can prop up the drawing-board on a desk or a table with a thick book or a sturdy box underneath to place the board at an angle that’s comfortable for them. Just laying it flat on a table-top may also be comfortable at times, if you stand up and work on it. Give yourself the flexibility to change positions from time to time — to save your eyesight, back, and neck.
I recommend finding a space on a table, desk, floor+wall, drafting table, or an easel — any sturdy surface against or on top of which you can position your drawing board securely and address it comfortably by being able to maintain enough space and physical distance between it and yourself, where you can move your entire arm, neck and shoulders freely. Think of giving instructions to your pencil not just with your fingers but through your entire arm, elbow, forearm, shoulder joint, neck, and all the way from your vantage point, that is, your head and your eyes, through your brain. This entire path should be able to engage freely in the ‘performance space’ you create for your drawing. It doesn’t need to be a huge space, but comfortable enough and free of clutter and distractions, as much as possible.
Conventionally speaking, some people prefer a somewhat upright but slightly tilted surface to work on, such as an easel or a drawing-horse, while some others find them downright uncomfortable, as evident by the post on this drawing blogLinks to an external site., shared here to show you what a drawing horse looks like — and also to share a good example of the figure-ground/positive-negative drawing (our next module). I personally like to use these drawing horse-type studio furniture (usually found at art schools) for large scale figure drawings in a group setting but not for smaller pieces at my home-studio.
Light:
Indirect but abundant natural daylight is the best. We are so fortunate with that in NM. Try to find a spot close enough to a window or an enclosed sun-room that can bring plenty of day light for an extended period of time even when the sunlight is not shining directly on your work surface or your eyes, which you should avoid of course. If night time is the only time you can work on your art projects or if there’s no big window — then shining a strong desk lamp on the white wall and ceiling next to your work surface can add enough ambient light. Or you may want to invest in a clip-on daylight lampLinks to an external site.for artists that attaches to the table or even the board, as long as it’s not focusing on one little spot too strong. Here is a good article explaining the importance of color temperatureLinks to an external site. of the bulb when you shop for it.
Light for studying cast shadows: You might however need an ordinary desk-lampLinks to an external site. or some kind of strong directional light for setting up your still life arrangements with cast shadows — if you chose to use cast shadows as an important part of your still life. It could even be a flashlight to take a photo and work from the photo (while not ideal). To understand cast shadows, the alternative to using a desk lamp — is to study cast shadows outdoors on adobe walls. You can go out and sketch or take photos of our fabulous Santa Fe architecture in early morning or late afternoonLinks to an external site. on a sunny day, for crisp, sharp cast shadows — and build your composition based on those studies. The springtime interplay of bright sunlight and shadows in Santa Fe and in NM in general can provide great visual inspirations for the Final project (in April) showcasing dramatic cast shadows. Start noticing the direction of light plays in creating such dramatic effects.
In other words:
To create a well-lit area with plenty of ambient (indirect) light — find a window that brings in good amount of natural daylight or point a strong enough lamp facing toward white-colored wall/ceiling/board, etc. and use the reflected light from the white surface to brighten your work area.
To set up a dramatic still-life with sharp cast shadows, use directional light (cheap desk-lamps work just fineLinks to an external site.) pointing toward your subject matter, but not pointing toward your work surface or your eyes.
Various Types of Lines including Contour & Gesture Drawing
- An overview of various types of line drawingsLinks to an external site.
- Examples of various types of lines and line drawings: https://www.pinterest.com/sudeshnasen/lines/
- Contour Lines: Blind Contour, Continuous Contour & Adjusted Contour Drawing (images used are open source image-files collected from various art teachers’ resources online)
- Intro to the basics of contour drawing and gesture drawing:
- Contour Drawing: We will first focus on contour drawing. Contour drawing is often considered the first step in beginning observational drawing, as opposed to imaginary drawing. The goal and benefit of the practice of contour drawing is to become acutely aware of the edges of the objects/forms we observe. A contour drawing is all about using your pencil to follow the edges of the object you are looking at. The edge of the object separate the object from its background, defines the object as a result, and that’s what we are learning to pay attention to. Value contrast between the object and the background actually creates that separation. Either the object has to be light against a dark background or the background has to be dark to make the object clearly visible. So, make sure the object you chose to draw is clearly visible against its background, meaning there’s a good value contras between them.
The basic idea in a blind contour is to let your pencil work with the path of your eye:
Continuous contour drawing:
Modified or adjusted contour drawing:
- Gesture Drawing: Even though we are not focusing on gesture drawing that much at this point, these videos can help us understand the beauty of the expressive qualities of lines in gesture drawing, which we will explore further later in the semester when we explore capturing the volume and tonality of 3D forms before moving onto shading. Here’s a recording from one of my live class-demos from another semester, showing how we build the volume of an object by starting with gestural lines and then combine mass-gesture drawing and cross-contour drawing to further build the form–shared here to make you see the use of gesture drawing further down the road:
In the meantime, you can always start practicing basic gesture drawings on your sketchbook as part of your warm-up routine and share, if you feel like and if you have questions. You can get an idea of the basic concepts from these videos:
- Another approach related to gesture drawing as an intuitive and exploratory form of mark-making can lead to growth and development of personal styles. Sharing this video to give you an exposure to such an exercise in a group setting, with music and well-explained narration, even though you are not expected to go this route right away in Drawing I. You may however explore something similar on your own. I want to open up the possibilities for you. Enjoy!
A Note about Ellipse in Perspective
A common challenge we face while drawing any symmetrical manmade object with a circular top such as a vase or a coffee mug is to keep track of the perspective distortion of the circular shape to an ellipse. The degree of curvature of the ellipse depends on the artist’s eye level. The diagrams below illustrate the point:
Ellipse in perspective. Notice the degrees of curvature that’s dependent of the artist-viewer’s eye level and view.


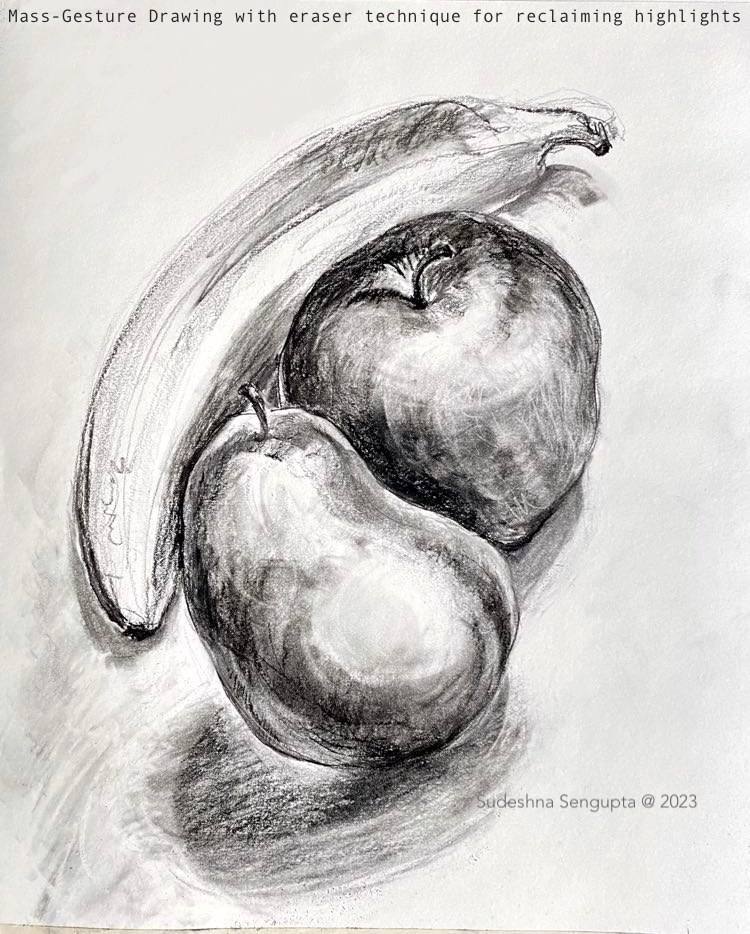
Contour Drawing vs. Gesture Drawing & Mass-Gesture Drawing
Contour drawing is a basic outline drawing that’s made with care observation following the separation between the main object from its background, whereas a quick sketch capturing the overall feeling or essence of the form or forms is a gesture drawing that may even introduce some tonality into the drawing without minute details. Gesture drawing helps build your confidence and familiarity with the subject by connecting with it. The use of eraser is discouraged in the process and instead multiple lines following the surface undulations can help build a better understanding of the form(s).
Gesture drawings that go beyond the basic sketching lines and show more volume and dimension with a hint of tonality and cross-contour lines are called Mass-gesture drawings.

From Line Gesture to Mass-Gesture Drawing
Line Gesture to Mass-Gesture Drawing (Tonal Shading) Part 1:
Line Gesture Drawing to Mass Gesture Drawing (Tonal Shading) Part 2:
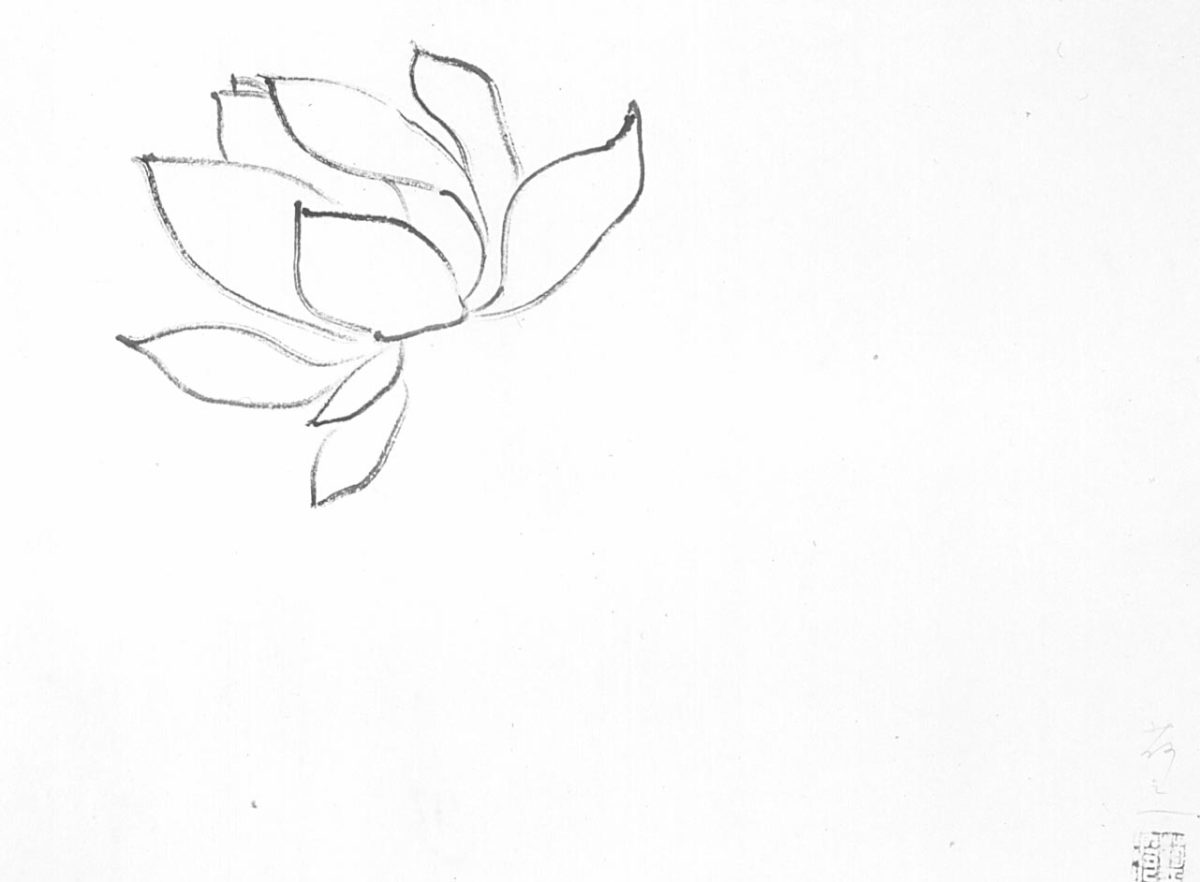
For understanding this subtle but powerful quality of line you may search and look for the expressive lines usually found in various classical traditions of Far Eastern Asian, South-East Asian, and South Asian art.
As we know, Georgia O’Keeffe along with many modern masters were deeply inspired by these non-western art traditions.
Lines & Brush-Strokes Inspired by Classical Chinese Art


To get in touch with the instructor, please feel free to write to SudeshnasArt@gmail.com

