- Drawing Inspiration from Georgia O’Keeffe’s Watercolors
- Watercolor Tools
- Watercolor Washes
- Brushwork Practice
- Colors & Paints
- Recommended Supplies
Utilizing Georgia O’Keeffe’s watercolors as examples, this page accompanies Sudeshna Sengupta’s live lecture-presentations and technique-demonstrations aiming to prepare learners about starting their watercolor practice with a solid foundation on understanding the medium and its tools and techniques through a structured approach that combines instructor guidance and the hands-on exploration by the learners. It has been put together to offer an in-depth guidance about tools, techniques, paper choice, brush care, and what to look for when selecting paint tubes and palettes, based on Sudeshna Sengupta’s experience teaching art and design at college level for over three decades.
Drawing Inspiration from Georgia O’Keeffe’s Watercolors
Georgia O’Keeffe’s Watercolors from the O’Keeffe Museums’s collection online
An excellent essay with images on O’Keeffe’s watercolors
Georgia O’Keeffe’s use of wet-in-wet and glazing techniques:


About “Red and Green II” Georgia O’Keeffe, 1916 Watercolor on paper.
https://news.artnet.com/market/georgia-o-keeffe-painting-red-green-in-texas-502649
Lesson Topics for starting your focused practice
Watercolor Tools
Watercolor Washes
Brushwork Practice
Colors & Paints
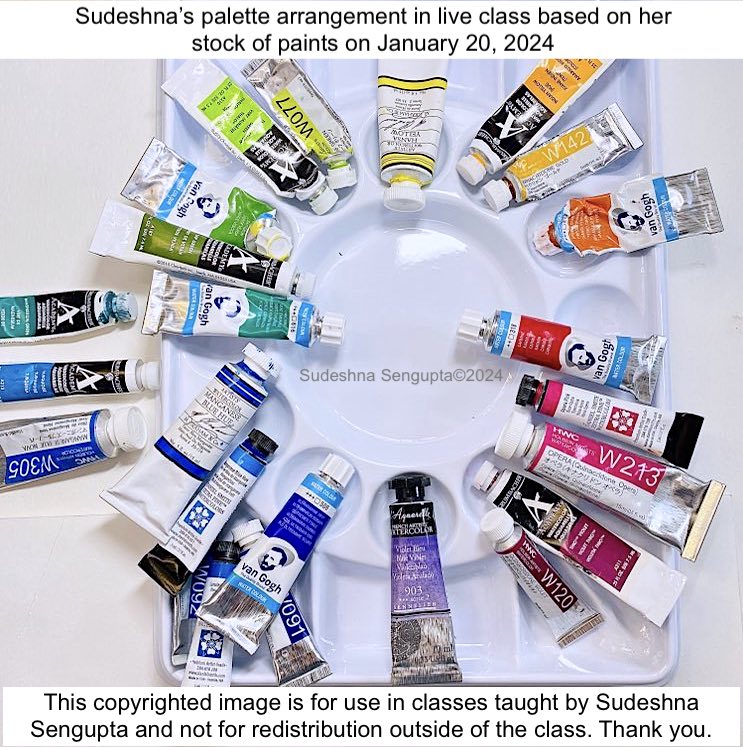
Painting the color wheel is the best way to see for yourself the relationship between colors and how they mix with each other and what the mixes offer us. Arranging your paints in a 12-well circular palette can also be an excellent start to keep track of the color relationships between your paints and mix them accordingly.
Paint Palette
Larger palette always seems inviting and useful but how it’s organized matters — whether it works well for your ways of mixing paints ultimately determines what you might develop a preference for. To be able to arrange the paints according to the CMY color wheel, I prefer the Jones Travel Palette (no affiliation) that has the exact number of wells that is in the color wheel that we will follow. You will develop your liking and see what works best for you.

Organizing the main paints on a palette that’s designed like a color-wheel helps the artist keep track of the color values and color relationships between each set of complementary colors as well as neighboring (analogous) colors — for making informed choices in color mixing.
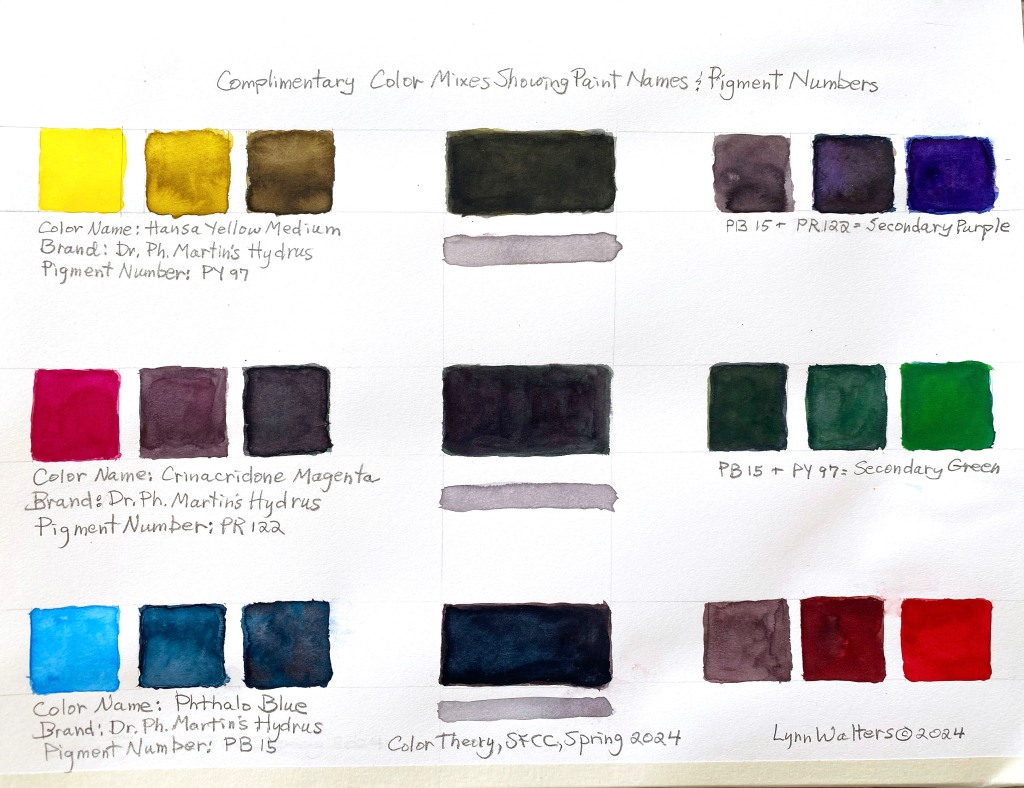
How Complementary Paint Mixes Affect Each Other

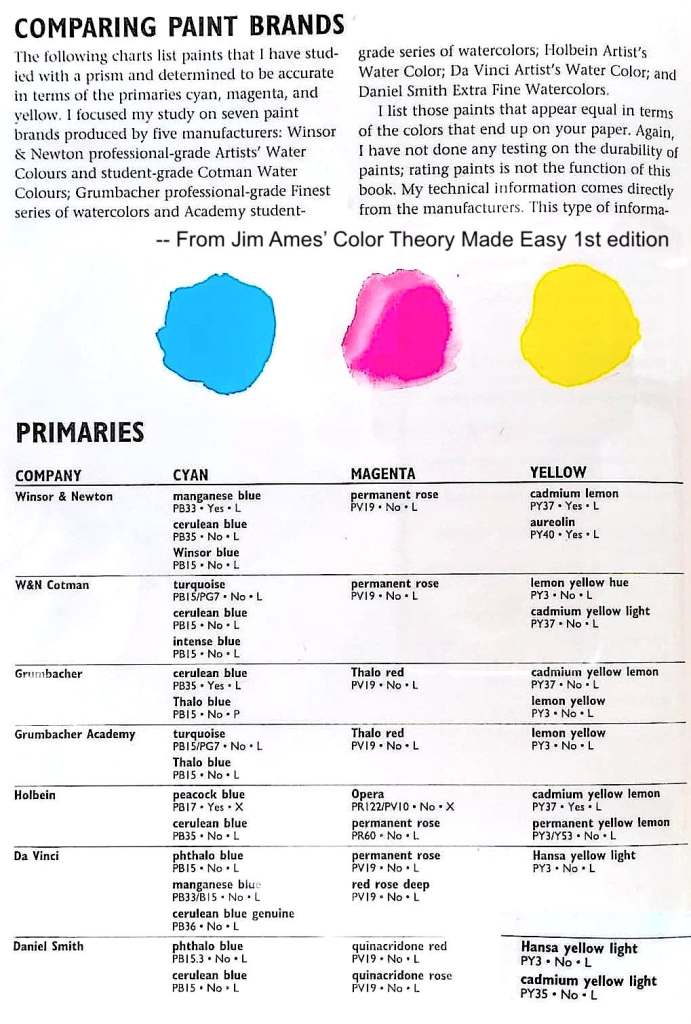
Understanding Paint Pigments, & Brands of Paints
Pigment Numbers & Their Characteristics
| Useful links: How to check for paints that are transparent, opaque, sedimentary, staining, etc. by making color charts as well as learning how to read watercolor paint labels (Links to an external site.) and understand the paint characteristics even before buying paints. Even though the first site deals with acrylics and oils, that same principles apply to watercolor. |
Making Your Paint Pigment Charts
Using your existing collection of watercolors — make as many paint-swatches as you would like, to check their coverage-strength or ability to block the color underneath. You many use black acrylic paint, thick Sharpie marker, India ink, or put a narrow piece of black tape to draw the strip. This experiment will help you determine which paints are transparent, which ones are semi-transparent, semi-opaque or opaque. Notice whether certain colors such as ultramarine blue or a true manganese blue (not manganese blue hue) leave traces of sedimentary deposits in the recessed parts of the surface of the paper as they dry. If they do, that would mean these paints contain sedimentary pigment particles that are heavier than usual. This characteristic quality can be utilized for achieving certain effects. Try lifting parts of the painted areas and see which paints lift easily and which paints tends to leave a stubborn stain on the paper. This also depends on the absorbency of paper itself.
Build Your Color Journal / Paint Pigment Database
You are also encouraged to make a paint chart using your own collection of paint tubes, following the examples shown below from this highly recommended blog by watercolorist Jane Blundell. Remember to put a line with a thick black Sharpie underneath each color swatch, so you can tell by the amount of coverage, whether the paint is more opaque of more transparent. To understand these subtle differences, you may also take a look at this blog to understand what the S (Staining), Transparent (T), Opaque (O), and Granulating (G) characteristic mean for paints and how to look for them.
Note down your color names but most importantly their pigment numbers, and other characteristics found in these tests. Note down whether a paint is a single-pigment paint or a mixture of pigments. A single pigment paint, even if it is not an accurate primary color — might actually be useful for creating clean mixes for practical purposes. Notice how different brands name and market the same pigment differently.
This is a good time to pay further attention to paint labels, (Links to an external site.)which can help your predict and organize your experiments.
Building Paint Pigment Chart in Watercolor Part 1 (video)
Building Paint Pigment Chart in Watercolor Part 2 (video)
Example:


Recommended Supplies
List of supplies available at merriartist.com in Oregon, USA. The same or similar items should be available from other online sources in the US and most places in Europe as well:
- Jones Travel Palette: 12 well + mixing areas with lid
- Fluid 140lbs Cold Press acid-free Watercolor block 12” x 16″. It has two glued sides and requires the other two sides to be taped down in order to stay fully flat during painting and until the completed painting is fully dry before removal from the block.
- Strathmore 500 series (100 % cotton & acid free) 140 lbs Cold Press Ready-Cut Sheets 11” x 14” six pack
- Royal Soft-Grip Watercolor Round brushes in size 6, 8, 10, 12, 14 and Watercolor Flat 1” or Simply Simmons Watercolor Round brush no 6, 8, 10, 12 and Watercolor Flat 1”
- Watercolor tubes in these or similar colors:
- M. Graham Hansa Yellow,
- Holbein or Daniel Smith Quinacridone Gold
- Van Gogh Vermillion or Pyrrole Orange or Permanent Orange,
- Van Gogh Carmine,
- Van Gogh Rose orQuinacridone Rose, or Holbein Opera or Daniel Smith Opera Pink,
- Van Gogh Quinacridone Purple Blue,
- Van Gogh Ultramarine Blue,
- Daniel Smith Manganese Blue Hue,
- Van Gogh Viridian,
- Van Gogh Sap Green,
- Holbein Leaf Green (15 ml) or Van Gogh Permanent Yellowish Green
- Daniel Smith Burnt Sienna.
- Optional but recommended paints to add to your set as extra colors: Daniel Smith Cerulean Blue, Van Gogh Indian Yellow, Grumbacher Academy Thio Violet
- Optional: For adding details with watercolor pencils –Faber-Castell Goldfaber Aqua Pencil 12 color set in metal tin,


Sudeshna, thank you very much for sharing this information.
LikeLike
You’re welcome, Toni. I am glad they came handy for building a good foundation for watercolor practice.
LikeLike